How to Turn a Storyboard into AI Video: Settings, Motion Prompts and Scene Approval
Compose your storyboard, lock the panel images, choose video settings and switch the first panel to video mode. Describe the action and camera movement, refine the instruction with Craft, generate the scene and confirm the version you want to continue from.

The video starts at 13:17, where this lesson begins. Watch the full 27:09 tutorial.
In this part of the video
A storyboard image describes a moment; a video prompt describes what happens over time. Keep your approved images as the visual plan, then add the action, camera movement and duration needed to bring each shot to life.
What should I prepare before generating video?
Complete and compose the storyboard first. Lock the approved panel images so they are not accidentally redrawn. The tutorial explains that the composed board, characters and visual references provide context for the video scenes.
Which video settings should a beginner choose?
| Setting | How to decide |
|---|---|
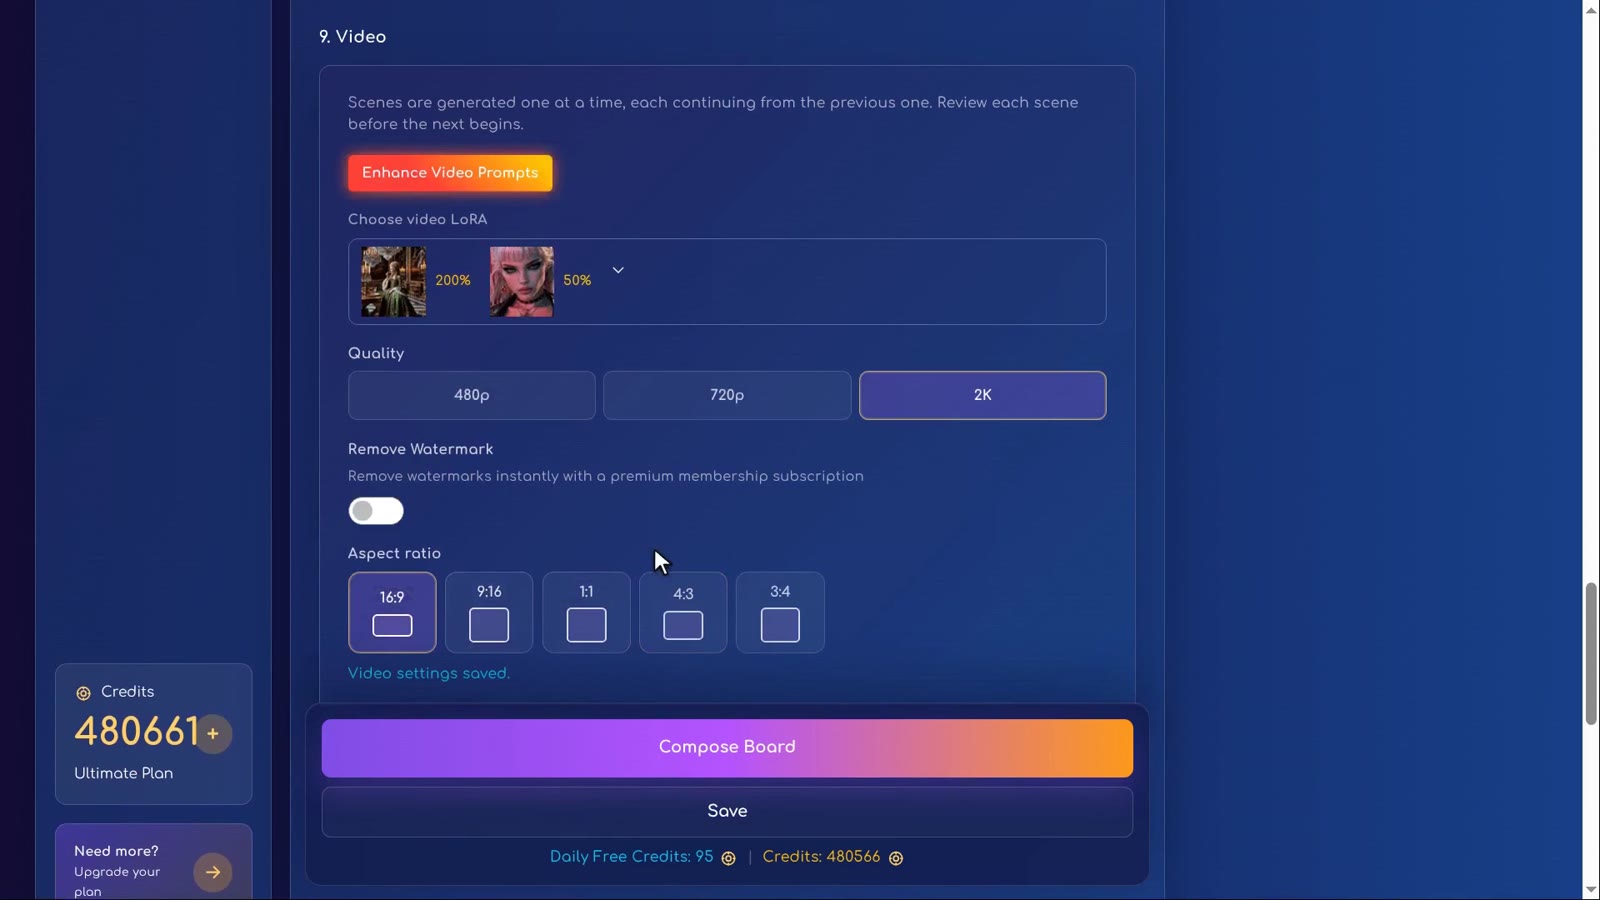
| Resolution / quality | Use 480p to experiment with your free daily credits; review the displayed cost. The demonstration chooses 2K for its finished film. |
| Aspect ratio | The film uses widescreen 16:9. Choose a format suited to where your own film will be watched. |
| Duration | Give the action enough time. The first scene in the demonstration uses 12 seconds. |
| Video LoRAs | These affect video detail or style. They are separate from the image-generation style choices. |
Higher resolution does not repair a confusing prompt. Test the action and composition before paying for repeated high-resolution attempts. Do not assume the free daily allowance covers unlimited clips or every quality setting.
How do I describe camera movement?
Write the sequence in order. Say which subject the camera follows, what the characters do and where the shot should end. Avoid asking for many unrelated shots in a short duration. For a continuation, describe what remains unchanged as well as what moves.
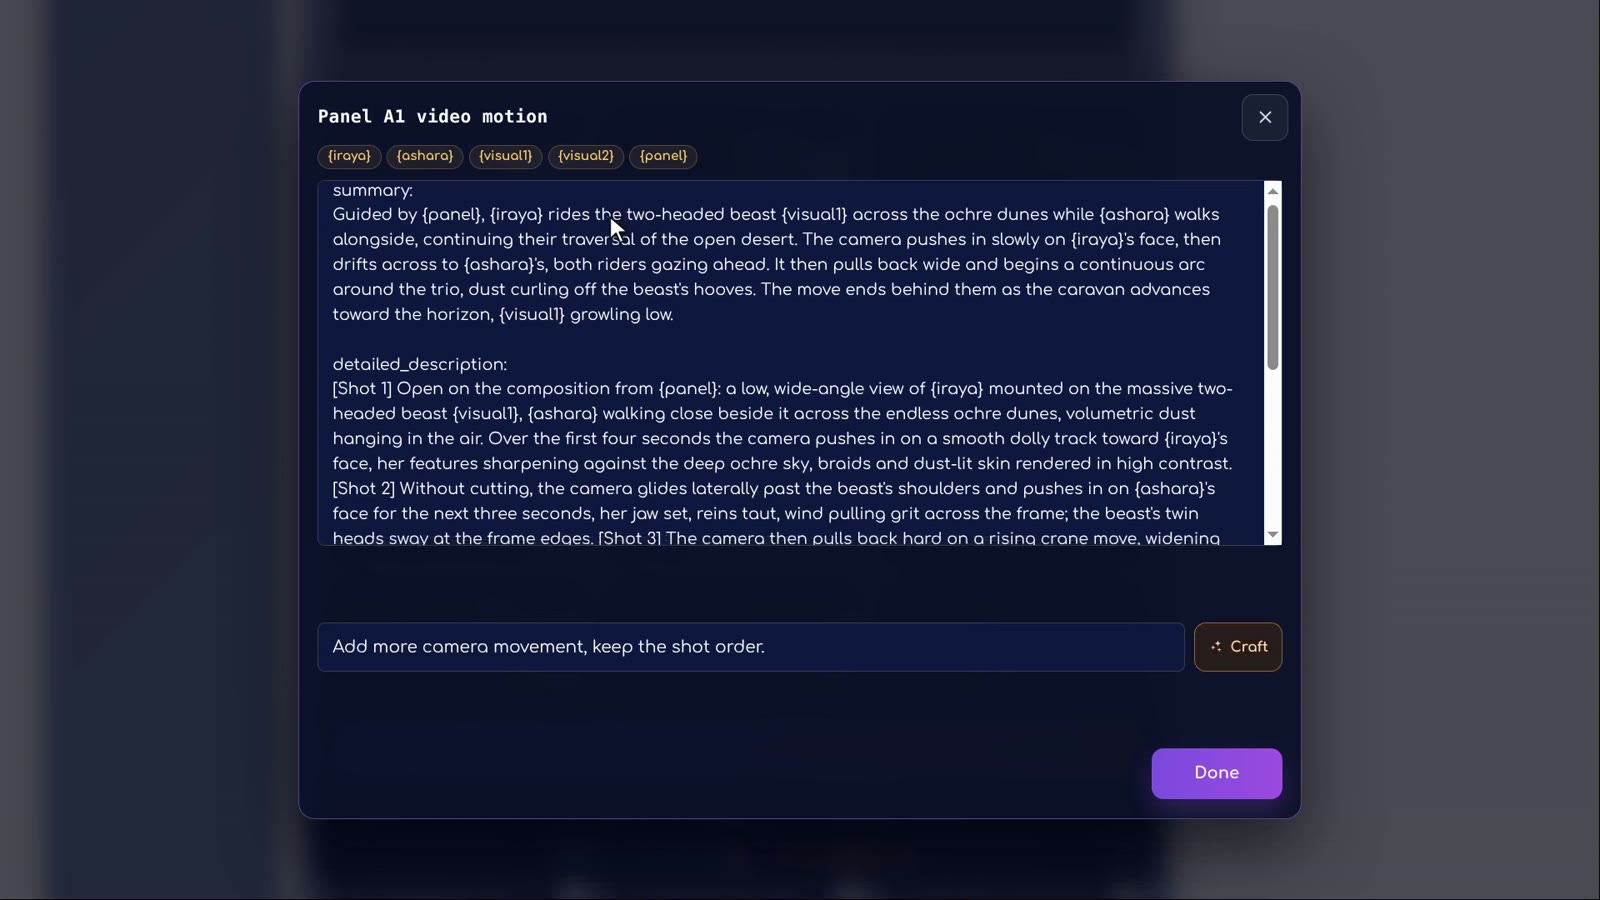
Use Craft to expand your short instruction into the format expected by the video model. In the tutorial this includes a summary, shots with timing and a soundscape. Check names, subject positions, weapons and the order of movements before accepting the rewritten prompt.
Step by step
-
Compose and lock
Finish the panel images, compose the board and lock the images you want to keep.
-
Choose video settings
Set quality and aspect ratio; review the credit cost before generation.
-
Open video mode
Click the camera button on the first panel.
-
Set a duration
Give the action enough time without trying to fit too many events into one scene.
-
Craft the motion prompt
Describe action and camera movement, then check the expanded prompt.
-
Generate and review
Watch the result, regenerate if needed and confirm the preferred version with the tick.
How we used this in Sleeping Sands of Kharuun
At 13:53 the narrator selects Fine Detail at 200 and Feature-film camera language at 50, then 2K and 16:9. These are settings used for this particular film, not universal recommendations. At 14:22 the first scene is set to 12 seconds.
The requested movement starts with Iraya’s face, then Ashara’s, pulls back and circles until the camera follows them from behind. Iraya stays on the beast while Ashara walks beside her. Craft turns that request into the structured prompt shown at 15:08.
After generation, the narrator reviews the result. Regenerate makes another attempt if the scene is unsuitable; the tick confirms the version to continue from. A correct-looking individual shot is not enough: its ending must also support the next shot.
What is the difference between Lock and Confirm?
Lock protects the panel image. Confirm approves the generated video scene so the next scene can continue from its ending. They are not interchangeable. If the next scene is unavailable, check whether the previous video has been confirmed.
Next, build a sequence one scene at a time and use Chain so far to review continuity.
FAQ
Can I try video with free credits?
You receive 100 free daily credits and can use them for 480p video while your balance covers the generation cost. This is not unlimited free generation. For higher resolutions you need sufficient credits, available through a subscription or credit purchase.
Why use Craft for a video prompt?
The tutorial recommends it to structure the instruction for Minimax, including scene description, shots, timing, subjects and sound. Read the result before generating.
Why can I not generate the next scene?
Confirm the preceding generated scene with the tick. Its ending provides the starting context for the next scene.
Try it yourself: Storyboard
Plan your film panel by panel with AI-written prompts.All lessons in this tutorial
- 01:14 Lesson 1 · Generate your heroes, beast and world
- 02:32 Lesson 2 · Make consistent characters with Character Asset Pack
- 05:10 Lesson 3 · Set up the storyboard and let AI write the panels
- 07:30 Lesson 4 · Edit panels with tags, Craft and versions
- 10:17 Lesson 5 · Write your own prompts and compose the board
- 13:17 Lesson 6 · Turn the storyboard into your first video scene
- 16:07 Lesson 7 · Chain scenes into one continuous film
- 21:01 Lesson 8 · Reveal the sandworm, refine details and download